


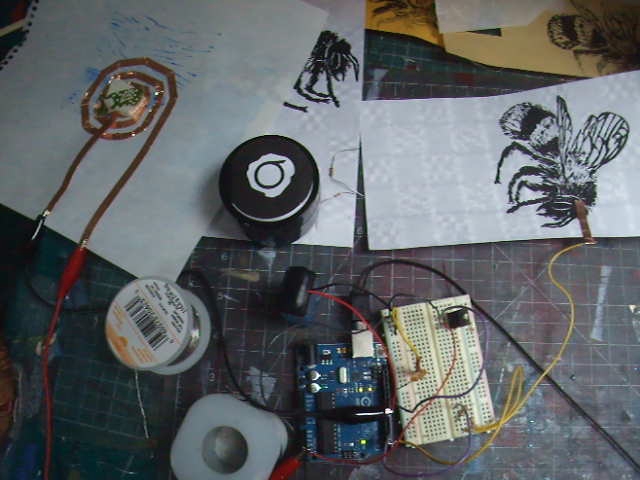
So, I can use my linocut on paper connected to an Arduino microcontroller as a sensor, and use the Arduino then to trigger a audio response when someone approaches the linocut. A very simple speaker can be made from a current-carrying wire in a spiral, affixed to a membrane, next to a strong magnet.** So, above I made a speaker with a piece of paper, copper tape as wire and a magnet. The next step was to carve a spiral lino block and block print a speaker on paper with electrically conductive paint, which I did. Thus an actual print, a sheet of paper, becomes both sensor and speaker. I had planned to then make a piece which had multiple bees as multiple sensors which would trigger different reponses. I created the artwork in time for my show about bees in 2013.
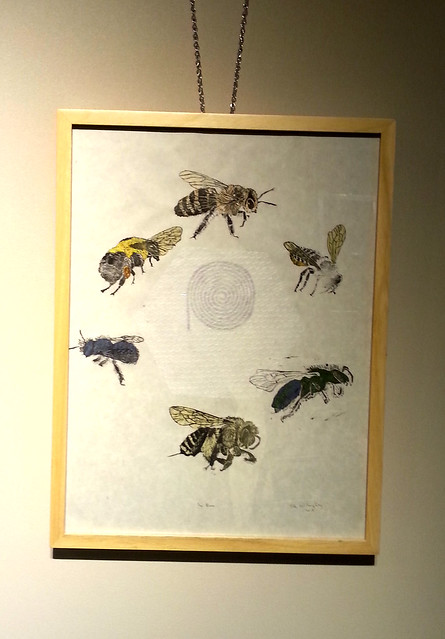 |
| The Bees, Ele Willoughby, linocut on various Japanese washi, 18" x 24", 2013. I had planned to add sound to this piece, but didn't have the opportunity. |
I had two issues. First, my prototype used only an Arduino. I was able to play back sound by keeping the recording length quite short and the sampling rate low. There's only so much on-board RAM. I could make multiple sensors each play the same recording, but I simply ran out of memory using only an Arduino.
Secondly, I got pregnant and chose to put electronics aside for a while. I couldn't find any reliable medical guidance about soldering electronics while pregnant or in the proximity of babies (as if there aren't in fact large numbers of engineers, scientists, artists and hobbiests who are women of child-bearing age, ahem!), but jewellers were warned to avoid lead solder, and I opted to err on the side of caution. Lead and developping nervous systems struck me as a bad combination.
So, now that my son is one and a half, I've had an opportunity to return to the idea. The obvious way to add more sound to a project is the off-the-shelf solution of adding a Wave Shield to the Arduino. This is a second circuit board which plugs into the first to let you control and play files from an SD card to a speaker. (Bare Paint has recently released their own microcontroller, the Touch board based on the Arduino, but specifically with their applications for their paint, such as capacitative sensors, in mind. This might have been an easier way to go... but I had an Arduino, so I chose to add a Wave Shield).
 |
| My bee lino blocks and spiral lino speaker block, along with the Arduino and Wave Shield. You can talk to the Arduino via serial port. I combined the open source code wavehc_play6.pde (which plays different 6 audio files when 6 different buttons are pushed) with ArduCapSenseBlinky.ino which employs a collection of capacitative sensors to trigger a collection of LEDs to flash. |
 |
| To make an electrical connection from my 6 bees (honeybee, bumblebee, leafcutter bee, long-horned bee, blue orchard mason bee and sweat bee), which I block printed in Bare Paint with block printing extender on Japanese kozo paper, I sewed through the paper with electrically conductive thread. I wanted the speaker, magnet and electronics to be behind the sheet, so I needed to pass through it. |
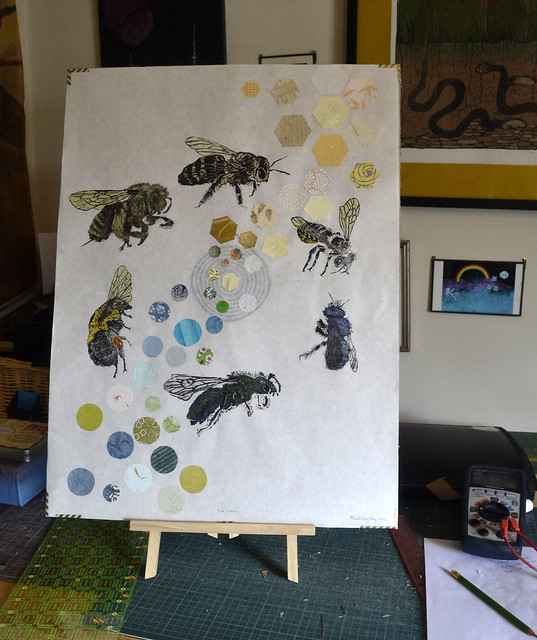 |
| I also printed each bee block on a variety of Japanese washi papers, to get the colour and texture of the bees and wings. This also hides the stitching/electrical connections. The story I'm telling with the piece is about how bees live here. We all know the honeybee, with its hexagonal cells in its hives, but it's not native to North America. Most of our native bees live in holes and burrows. They also come in a wide range of colours. So the other collaged, handmade papers, represent how the bees live, from the hexagons with the honey bee at the top in yellows, to the circles in blues and greens at the bottom. In this shot you can also see the spiral speaker printed on the reverse. The sheet is on kozo paper which is very strong, but not at all stiff. So I backed it with book board to have something on which to mount the electronics. My trusty multimeter is there so I can check that each bee does have good connectivity through to the digital I/O pin on the Arduino. |
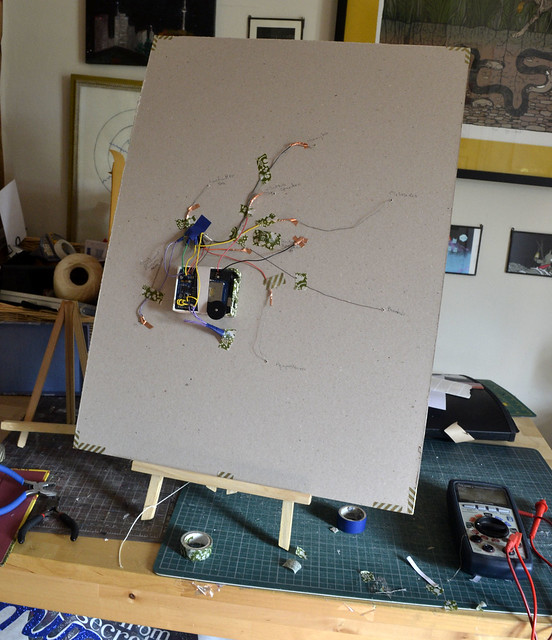 |
| This is what's hiding behind the piece. I affixed a small box to hold the Arduino. There are six DIO pins at the top of the Wave Shield board connected to wires in purple, green, yellow, orange, red and brown. These in turn are connected using copper tape to each of the 6 conductive threads coming from the 6 bees. The threads from either end of the speak spiral are likewise connected to the speaker output and ground. |
*In fact, this is how the gravimeter I used for my doctorate worked too. Picture a mass suspended on a spring such that the spring force upward is balanced by gravity downward. Should the force of gravity change as you move the sensor (due to a large buried mass below, for instance) the mass on a spring will no longer be in equilibrium. The sensor was the most extraordinary, delicate, tiny, spun quartz spring terminated with a tiny piece of quartz coated in gold between capacitative plates. When the mass moved, an electrical restoring force was applied to the plates which returned the sensor to equilibrium. This restoring force could tell you the change in gravity, or, in my case acceleration (since I kept the gravimeter still, it was the seafloor which moved up and down).
**A good source of strong magnets: old hard drives
2 comments:
I cannot believe nobody has ever commented on this. It is amazing. I was in college with a professor that got within a few credits of an electrical engineering degree and suddenly switched to art. He made pieces that lit up, buzzed, and reacted to people walking into the gallery. People would stand in front of them for hours to see if they could figure out when it repeated. (24 hours so they missed that!) They were big wooden things with all kinds of circuits and little lights and wires all over--(it was the 1970s so things were more concrete, big, and clunky then) but this is just magical. I want the book--the electrical part is a bit beyond me. Could you do this on fabric? I want to wear a native bee that hums or flaps its wings when other people come close or glows and lights up or something!
Thank you!
It is much easier to build interactive artwork than it was in the 70s! I've been building electronics since the late 90s and it's gotten easier and smaller in that time.
Absolutely, you could do this on fabric. There are some off-the-shelf microprocessors designed specifically for wearables like FLORA or the Adafruit Gemma. You can get electrically conductive thread and even fabric. Check out my Resources page for some useful links: http://minouette.blogspot.com/p/resources.html
Humming or glowing are easier to acheive than flapping (especially on a larger, heavier scale where you need something strong enough to move it).
Post a Comment