


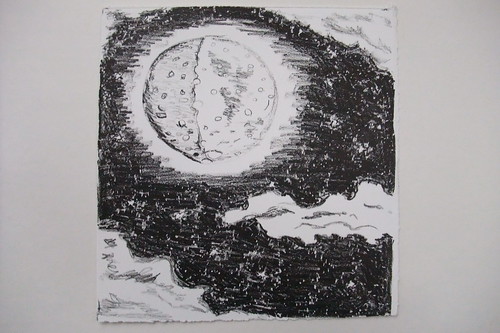
As promised, here is my first (and only) lithographic print. It is one of four. I forgot to measure it, but it's roughly 6" x 6.5". I just drew free-hand onto the stone. The process is rather involved and based on the antipathy of oil and water. After polishing, I drew on the stone using grease pencils of different hardnesses. These pencils also contain wax, so much like a wax crayon, they can pick up flecks of drawn lines, as well as add new lines. I used this effect purposes, so the lifted flecks could be stars. Our instructor took care of the stone-sensitizing (called 'etching' though this is now known to not be chemically accurate). An acid is applied to the limestone base to 'sensitize' it. There are all sorts of subtleties in the selection of the acidity (or 'etch'), and differ values can and are applied to different regions of the stone. These are selected as a function of media applied, darkness, intensity, line density, and basically experience. Like purposely over-exposing a photographic negative, one can also 'burn' out a region of a drawing for tonal effect. The stone is wet, and because the grease and water are immiscible, when ink is applied, it only covers the greased/drawn areas of the stone. The prints are pulled on a special press, such that weight is applied directly down. It is no mean feat to pull a print. I tried one: it involved another student wetting the stone, followed by me inking the stone, back and forth iteratively, about six times, and then releasing the clutch and lowering the arm (clearly designed for someone taller and stronger than I).
The potential of the method is amazing, but so is the fact that we managed to pull any prints whatsoever within 3 hours.

Yesterday we did etching, something I haven't done in years. This is also something challenging to do within 3 hours, in particular, since we began with industrial quality zinc plates, rather than prepared plates. Though it was good to learn these steps of the process, as they were new to me. So first, we had to polish them and then apply a hard ground (a waxy substance). We had about 45 minutes to draw/scratch into the hard ground. I got a bit caught up in making sure I was scratching hard enough and did not feel I had a flexibility of line. In this amount of time, there was no chance to correct any mistakes. My swans have weird heads. My drawing style is sketchy and this time, my first, imperfect lines had to be preserved. But, knowing the method, I did plan my subject so that I could take advantage of "plate play" (the discretion of the artist in what ink to remove or not from the plate) and built this into my design. Once the hard ground is scratched, the plates are submerged in acid; also, in 3 hours, there was no time for discretion here, and all plates were exposed to acid for the same amount of time (mine could have done with less). We then cleaned off the hard ground and inked the plates. I wanted to have the lines inked (the entire point of intaglio) and also to have a gradient in tone from top to bottom, with highlights of white swans (of course) and various ovals within the water. I think this worked well, though I could have left even more ink on the plate. We only had time for a single print.
No comments:
Post a Comment